DIY Cornhole

So I live with 2 guys…
(an architect and a woodworker)… and not to beat my own drum, but I made our cornhole set…(almost) all by myself with very little woodworking experience. Ready to be more impressed? Almost all of it was made out of trash from work. Or what was going to be trash. Since we pay for trash to be taken from the building, there’s a process that you can sign out scraps and take it home. So the tops of my boards were formerly MDF that protected the walls around the elevators, which the carpenter helped me to cut to size. As luck would have it, he was also in the midst of cleaning out his paint supply, again… free to take if you sign it out. I grabbed black, white, blue and red paint as I was up in the air about the final design. And my good luck continues, he also has a hole saw… which was a little bigger than the regulation size (6 1/4″ versus 6″) whatever… I am not hosting an official tournament anytime soon… plus it was free! He cut the holes for me and showed me how to use a countersink bit to build the rest of the board.
Making of the boards
I had to borrow Greg’s car to get the materials home as my car is the size of a shoebox, so I took that opportunity to stop next door at the Home Depot to get the 2x4s for the frame as well as the hardware to finish the boards. Who would have thought buying carriage bolts would be so confusing? Apparently you don’t match up the measurements like I would think you would… the guy in the orange apron was passionately trying to explain it to me, but it still didn’t make much sense. He sighed and just handed me the bolts and said you’re all set, clearly disappointed that this wasn’t learning moment for me… but away I went.
I built them in them in the backyard so I wouldn’t have a mess to clean up in the house. The other thing that makes this so impressive (at least to me) is that I CAN NOT stand touching raw wood. Hate it. Avoid at all costs… maybe it’s rooted in my deep paranoia about getting a splinter… I have no idea, but I loathe it. A smart person would have realized this about themselves and would have probably bought gloves or something. You should have seen me trying to get the 2x4s into the car without actually touching them. But throughout this project, I did not use gloves or get a splinter… so maybe I grew up a bit. I am certainly not going to go hug a pallet or anything anytime soon, but, you know, baby steps.
Anyway, our carpenter told me how to mud over the holes attaching the frame using a mix of Elmer’s white glue + leftover sawdust. Genius. I shopped the glue at the Home Depot and I thought, Elmer’s Wood Glue would be perfect. I was wrong. That made a clumpy paste-y mess that took forever to dry. Which was unfortunate because I had borrowed the orbital sander but could only have it for that one night. So the next night, I tried to hand sand it and that was taking an eternity. I finally used the only power tool I have, my Dremmel, to sand it down faster, which did work. Luckily, I only had to worry about the screw holes and not sand the whole thing. I might have given up at that point.
Making them pretty…
So I brought them up to my dining room to finish the design. I was toying with a bunch of different ideas for the design. My first thought was to combine the colors/logos of all the sports teams that the boys and I like. The designer in me was overwhelmed with trying to make that work. I mean, black and gold for the Steelers, blue and red for the Bills, green and yellow for the Packers? Gross. And then I thought, what happens when we don’t live together anymore? That will look stupid. And plus… I am putting in all of the work, so in essence… dealer’s choice. I didn’t think that the Steelers would be a popular choice given that I live in New England and most of my friends are diehard Patriot fans, therefore would probably refuse to play on them. So, then I started thinking about my alma mater, the University of Dayton. That seemed like the safest choice, but I am not wild about their new logo… I started googling different designs just for inspiration. There are some pretty crazy things out there! But then I finally went back to the good old Steelers after seeing a really cool Terrible Towel board design. Why not?
The final design
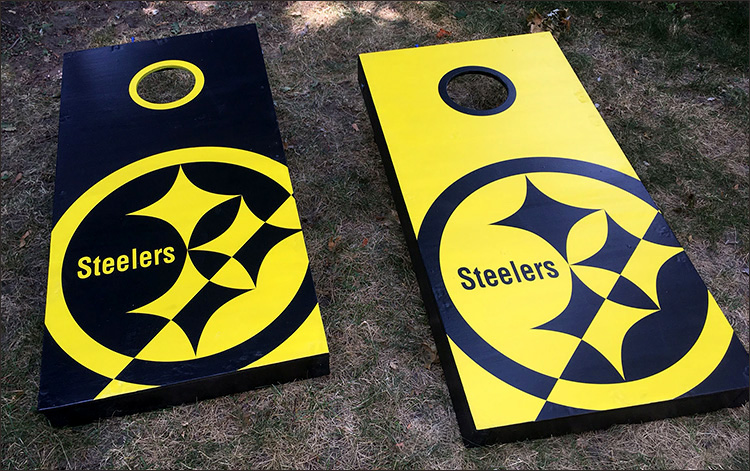
After having access to a vinyl cutter at work and dreaming about all the cool projects I could do if I had one of my own, the Silhouette Cameo was discovered. Ironically it is made by the same brand as the one we use at work. Perfect. Bought it immediately after hearing about it a few years ago and was thrilled to have another project. After my inspirational research, I decided I like the board sets that had the same design both boards but reversed. The Steelers logo is mostly black and white with a small bit of red, blue and yellow. We already had blue and red bags, so I decided to simplify the colors and just do black and yellow reversed from each other. Luckily I still had the gallon of yellow paint that we used on my bedroom ceiling, so I used that as a base and cut black vinyl as the actual logo. So after painting the base coat, applying the vinyl, sealing both boards inside and out, waiting for it to dry… the decoration portion of this project took way longer than I thought it would, meaning my dining room became a workshop for the next week or so. Greg brought home a saws-all from work and helped me make the legs. There was this really great video tutorial on how to get the angle of the legs correct, so that was the next step and then putting it all together with the Home Depot hardware. And then of course the varnish, then more varnish and then one last coat, just in case. That guy in the video made his in 2 hours. I took about a week.
http://www.diypete.com/cornhole-board-plans/
I can’t believe how nice they turned out. Are they perfect? Far from. But for about $30, you can’t beat it. They are so much fun to play. And since they are yellow, we can actually still play at night as long as the yard lights are on, which is important when you live here and its pretty much dark by 4pm in the winter.
Keeping the score…
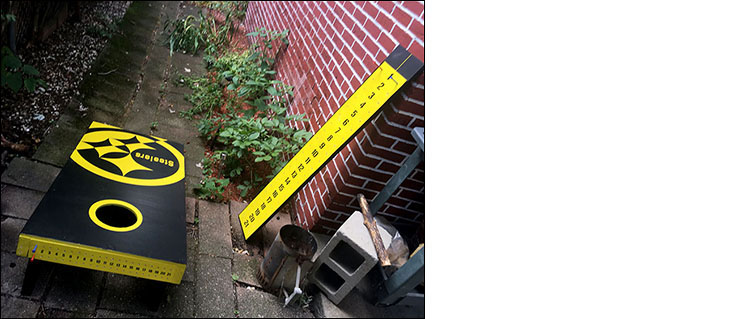
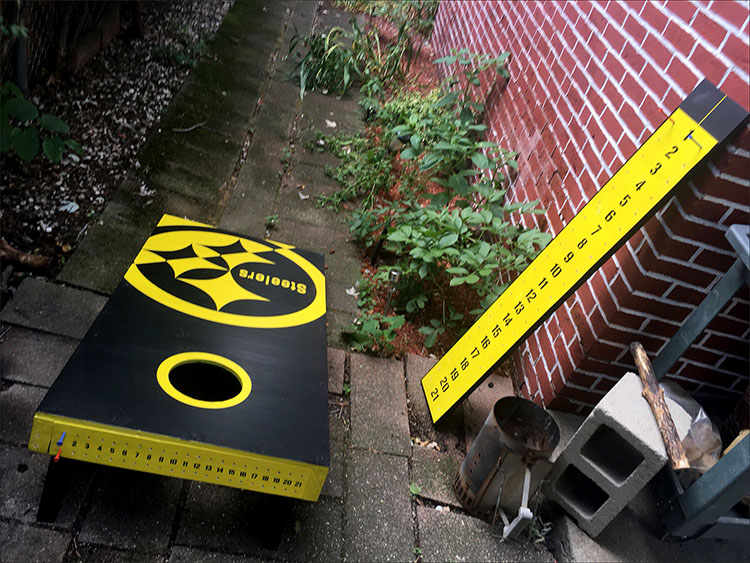
During my research and development phase, I stumbled on a really cool idea for keeping score, so I added that into the design in the back. I even repainted white golf tees blue and red to match the bags. Given that we have several backyard games like KanJam, ladder golf and that new one with the trampoline, I decided to buy a piece of wood (a stair tread worked perfectly) and do a standing scoreboard that could be used for all of them, which turns out is super convenient. Especially, if there’s a spectator that can keep score.
All in all, I am really happy with this project. I sent out a few pics to my family bragging about the total cost of $30 and instantly had orders for them from everyone… shipping those would cost way more than $30, not happening! They are crazy, but always welcome to come over and play. I am getting pretty good! Now I just need to make some cool bags to go with it… someday…


