If at first you don’t succeed…

Try, try, try, cry… then try again.
At least that’s the case when trying to use my Silhouette Cameo to cut shrink material into wearable earrings. But I will have to say, with a LOT of patience and trials, I finally figured it out. Kind of.
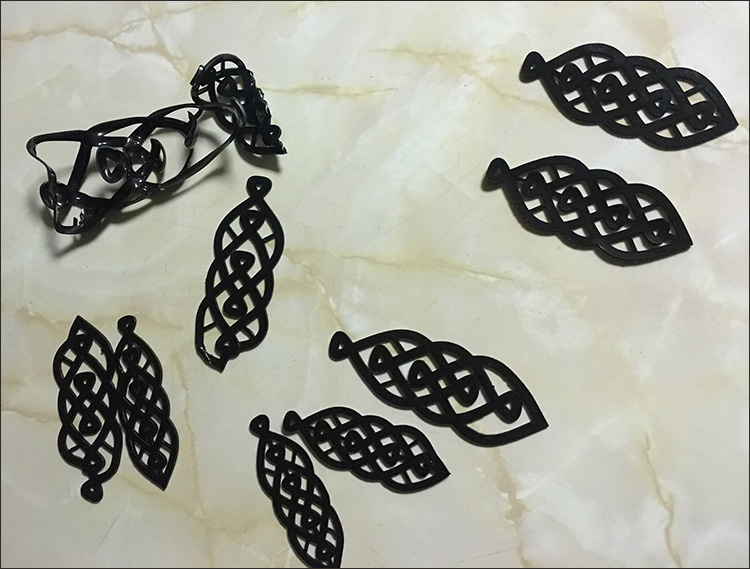
These are the finished products (along with all the fails) they are about 3 inches long. I am going to take you through the process to get here in hopes of helping you out with your next shrink project.
The Design phase
I started in Illustrator because as a professional graphic designer, it is just SO much easier to use a program I know like the back of my hand. Silhouette’s software has come a long way from when I first got the Cameo, but it’s no Illustrator. And now there’s a plug in called Silhouette Connect to cut directly from Illustrator or Corel Draw. Runs about $40, but talk about a life saver. I hated translating files into something the Cameo could cut in the Silhouette software, so I am just going to have to say, that’s the best craft money I have spent in a while. It means I can spend more time working in Illustrator on the next design while the cutter is running.
You can find the plug in here.
Cut it out!
Anyway, after I had a relatively simple, but sturdy design to experiment with, I started trying to cut. There is now a shrink material preset within the Silhouette Connect that tells you the knife speed, blade length, style of line to be cut etc. So I started with those settings. I will have to say, it took forever to weed (meaning to separate unwanted material from the design), even with the double cut. So I tried just layering the design (by copying and pasting in place, which simulates the double cut Cameo suggests) in the Illustrator file before it gets to the Cameo. I tried pasting 3x, I tried 4x and even 6x. Still wasn’t getting the easy weeding I was hoping to achieve.
I tried to lengthen the blade from the recommended 5 to 6 and that was a disaster. I think it caught the edge of the material and just swung everything off of the cutting mat while making the most horrible sound. It was then I started to realize my last few cutting jobs were paper and probably left some residue on the mat, preventing me from getting the material secured correctly.
So, I changed the mat to a brand new, never been used mat and thought, might as well change the blade. Luckily, I buy these in bulk and always have backup. That definitely helped. The design was set up side by side on half a sheet of shrink material and I noticed that the one on the right was remarkably easier to weed, so I just went back to Illustrator and pasted another copy over the left earring in hopes to get a better cut for a easier time weeding.
Weeding tools and techniques
Now onto weeding. I used to have a huge vinyl cutter at work, so I have my techniques for weeding always starting at a corner and working away from what you would like to keep. Also… this is HUGE, especially with shrink material… You always want to remove the smallest pieces first along with the areas with thin lines that are part of the design.
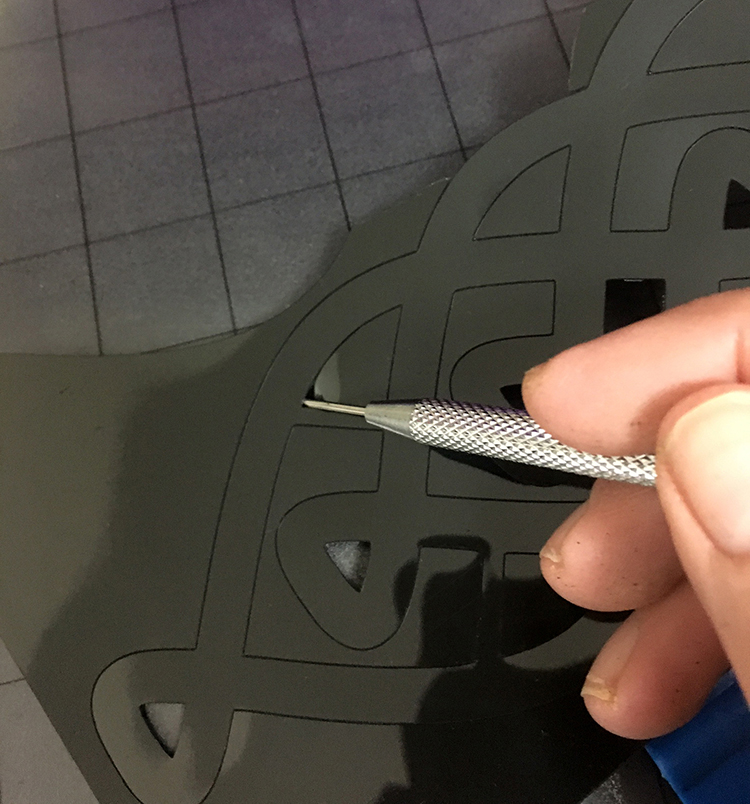
You will have a better success rate of weeding these delicate areas when there’s more material around to act as support… EVEN if its not part of the final design. You can see what I am talking about in this image. The little inner parts will come out easier with buffer all around.
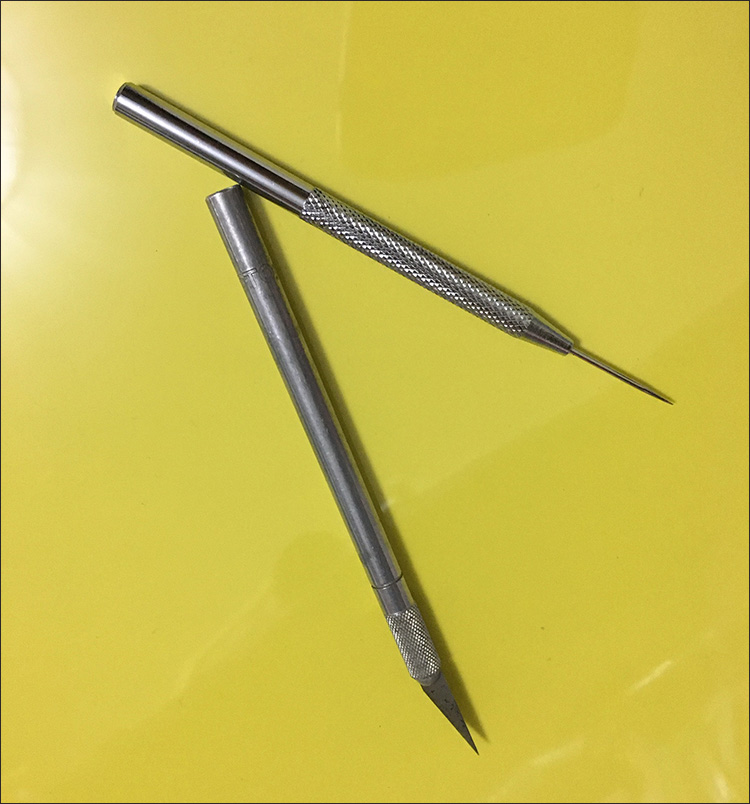
Now, these techniques I was speaking of are a little different for shrink material because you want to go all the way through the material, which isn’t the case with the vinyl I used to work with that had backing. Instead of starting with an Xacto knife, I started using this other tool I found laying around. I am sure it was from some paper crafting set to clean out something, but I can’t remember. It just looks like a dentist’s tool.
Anyway, I always start in the corner and press the sharp tip into the scored corner just enough to break through. You have to be very careful not to tear into the design, just keep it on the edge of the cut parts. Then I insert the tool a little deeper and hold it as parallel to the material as possible and just slowly spin the tool along the score mark. It separates the design from the excess very well and the scoring doesn’t run ahead of you because you aren’t putting much pressure to tear the piece. From there, you just work around the shape, taking it slow on the corners until you get the hang of the amount of pressure/speed required for a clean separation.
After an exercise in both patience and technique, you should end up with two cut outs of your design. But the work isn’t done. If you look at the closeup, you can see some edges that could stand to be cleaned up. This is where the Xacto comes in. I simply shave/scrape off those little bits to ensure a cleaner edge once baked. I am not 100% sure if it made a difference, but I would rather take the few seconds here than find out after baking that I skipped a crucial step by being lazy and ending up with rough edges.
All heated up and ready to go
We are ready for the oven! I use a small toaster oven because I have only had disastrous results using the full size gas one in my apartment. (But to be fair, I have disastrous results trying to use that thing to bake or cook ANYTHING. Just ask Greg.) I found this cool heat resistant material that I use in the pan under the piece. It’s also stick resistant as a bonus.
I was recently trolling around looking for tips for shrink projects and decided to actually read the package instructions. (Full disclosure, this is the first time I was using this brand, but still… mind blown…) The manufacturer suggests that if you lay another layer of parchment or something over the piece, it lessens the chances of it sticking to itself when it curls up. Genius. Another really interesting tip I read was “for larger or longer pieces, try heating at a lower temperature, slowing the shrinking process”. WHAT?? And then the last gem: Lowering the temperature will slow the absorption of heat, resulting in longer shrink time and reducing distortion. I realized I had been cranking up the heat to over 350 degrees to pacify my impatience and therefore sabotaging my efforts… Interesting.
So I tried all of those things, in addition to the tricks I have figured out along the way (like smashing it down with a flat bottomed dish to ensure the piece would be really flat while it was cooling down and hardening.) I have these awesome heat resistant gloves that make it really easy to work with shrink. When you are working in such a small window for success, it definitely helps not to be scrambling for hot pads.
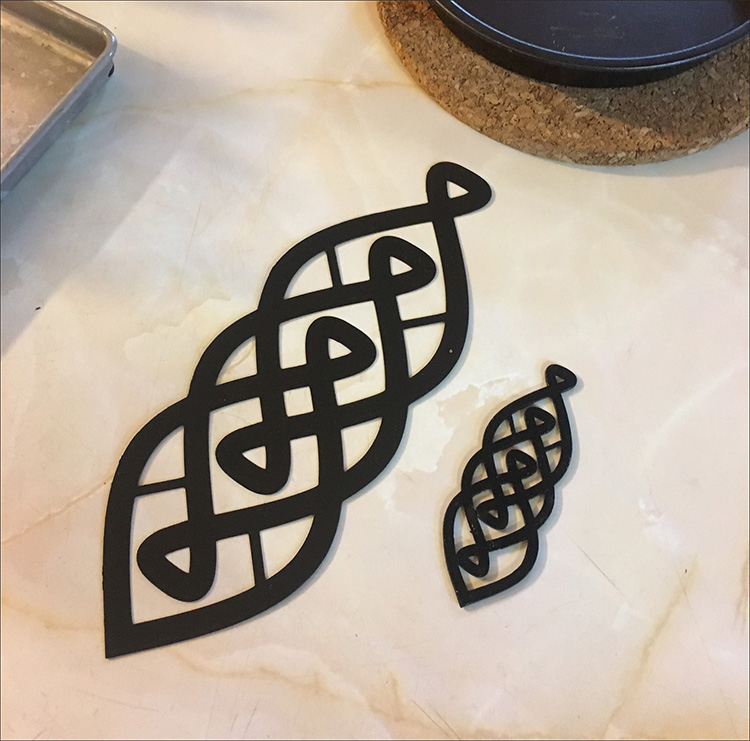
It’s crazy how much it actually shrinks after being baked… Here is the before and after, although the after still hasn’t quite made the cut. Onto the next attempt! I found it helpful to keep running more cuts on the Cameo while I was using the toaster oven to speed up production time. Hope my experimenting will help you skip some steps (and headaches) with your next project.


